Delicious pizza baking
Cooking is a great way to impress someone. It’s one thing to go to a restaurant but it’s much better to cook for the persona on your own. It’s so much more of a occasion isn’t it? However, If you want to go a step even further, build a wood fired pizza oven yourself.
So, as promised in the last post, here is how to build a wood fired oven on your own?
You’ll need: firebricks, reinforcement, furnace cement, normal bricks, all sorts of building tools, wood battens, wood flatness,
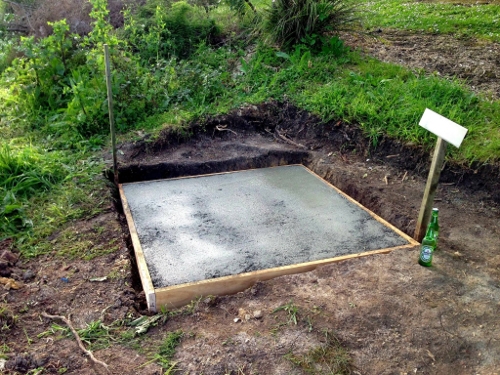
Start by digging the hole for the foundation of the oven. Decide about the size your oven will be and dig a square shaped hole. Then fill it with cement and reinforcement and wait it to dry for 3 days. The foundations must be no less than 30 cm in depth. You must also use shuttering when pouring the cement.

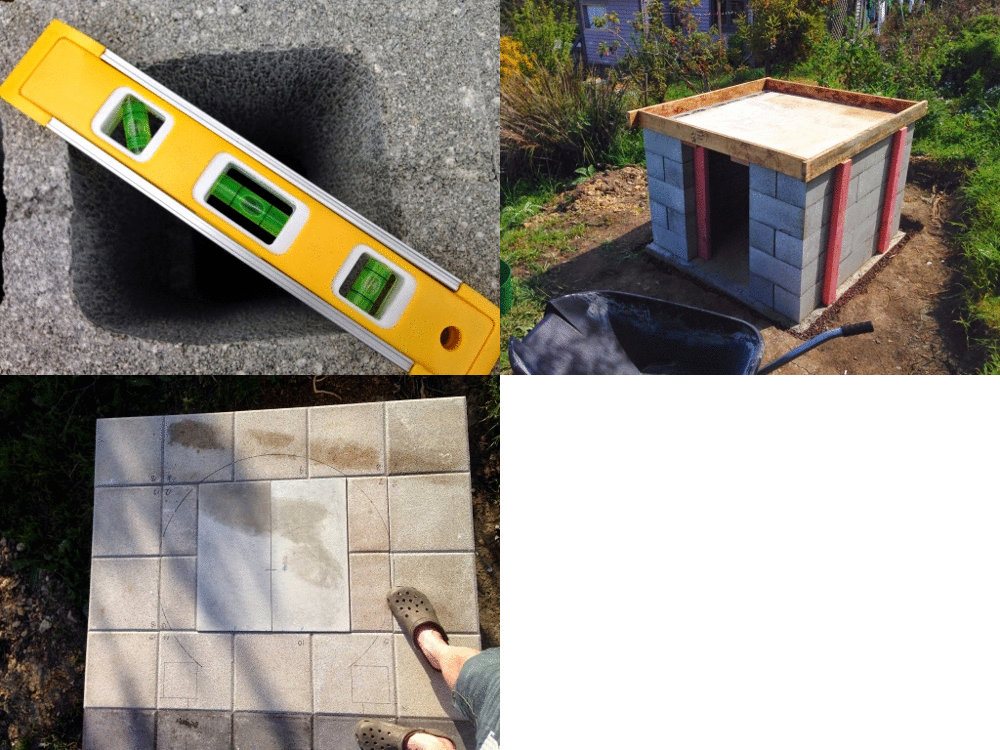
In the meantime, get the flat pieces of wood and lay them on the ground. Take more casing and place it around the flattnesses so that the corner of the battnes to step on the corner of the flatness. Pour a small layer of cement and order reinforcement and then pour a second layer of cement. You need these plates at least 10cm thick. Once you’ve flattered and leveled them, leave them to dry for 3 days. Once the cement dries, remove all wooden fixtures and place the plates aside. They will become the floor of your wood fired pizza oven.
The actual outdoor wood fired oven consists of two section:
- one is where the wood will be stored and the
- second one is the actual oven.
At that moment you should have your foundations dry and strong, so start building the walls of the first floor of your oven. Once the base is ready, start mason your oven. The bricks you use need to have big hollows in them where you will pour more fire resistant cement and reinforcement.

Tip: make sure the walls and the foundations have exactly 90 degree angle between.
Once all masonry done, fix the two cement plates on top of the structure.
From here on, you will be building the actual garden pizza oven.
Start by purchasing a building kit. These are metal structures with the shape of the dome and special slots for the bricks and for the chimney. Your actual oven will be build around that skeleton following the exact form, shape and order predicted by the engineers and the designers.
1. Cover the cement plates with usual bricks around the corners and firebricks at the center, where the fire will burn.
Tip: if you want to, you can use pizza baking stone instead of fire resistant bricks but shaping the stone is tougher.
2. Get the oven building kit which consists of two metal columns, one oval shaped dome, chimney and wood fired oven plans and. Around the metal skeleton you can start building your oven. Place the metal parts over the bottom of the oven as shown on the plans.
3. Build around the skeleton with flat firebricks. You need no more than 30% alumina bricks. They are light and can absorb more heat than your oven will probably ever produce. They are perfect for the job.
Tip: The higher you go, the more fixing cement will be needed for the fixings. The reason is of course, the rounded shape of the dome and the bigger distances between the outer sides of the bricks.
4. Once you build to the top, continue by repeating the same procedure on the other side. The last bricks you have to put will be the central ones.
Tip: You need the central bricks right in the center and with 90 degree angle between them and the foundations and the floor of the oven which on the other hand should be paralleled.
5. A second layer of bricks must be put on the first one. This time use normal bricks placed flat, on their wide sides.
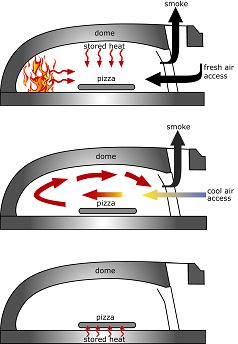
 6. The chimney is the last structure to erect. It must be build right over the entrance of the oven. The heat and the smoke will have to slide on the ceiling of the oven, heating the inside as much as possible, before going out. That is the most effective chimney design for wood burning stoves at the moment.
– Make a flat and leveled surface on the dome, around the metal skeleton and start building. Use your water level again. Put two layers of bricks. They’ll be more than enough. Wait it to dry for three days.
Tip: the chimney must be cleaned at least once a month if you use the stove regularly
7. Put a metal top over the chimney and remove the metal structure you were building around. Remove it from bottom to top, finishing with the piece used for the chimney.
8. Paint the dome of the oven with special heat resistant paint. That will increase it’s life and will make the oven cleaning easier.
Here is a detailed video on how to build your oven:
Here you can see different dome building technique, which however requires more special skills
Now you have your own wood fired oven.
Next week, i will tell you more about solar ovens and the way to build one of these on your own.


